Showing posts with label salt. Show all posts

Wednesday, August 20, 2014

Cheesy Zucchini Rice

     I saw this recipe on a different blog and I thought to myself, "I can make that better." And so I did.

     If you're wondering what Cheesy Zucchini Rice is, you might not be that quick on the uptake. It's exactly what it sounds like and best of all you can customize this dish to your preference! Originally, this recipe had "shredded zucchini in it, but I prefer a crunch to my vegetables. So this time, we're going to get out the peeler and do our very best to peel a zucchini or two. And it just so happens that I GREW a HUGE zucchini in my very own garden this Summer, BAM!


You will need:
  • 1 medium OR 2 small zucchini(s), peeled approximately 2 cups
  • 1 cup rice
  • 2 cups chicken broth OR 2 cups water and 2 chicken bouillon cubes
  • 1 cup sharp Cheddar cheese, OR go FANCY and use 1/3 cup Mozzarella, 1/3 cup Parmesan, and 1/3 cup Gruyere
  • 1/2 TSP garlic powder
  • salt and pepper to your liking
  • 1-2 TBSP milk (optional if it comes out too thick)


     Start with the rice first. This whole process should take under 25 minutes. Boil the chicken broth in a small sauce pot and then add the rice. While the rice is cooking, we're going to prep everything else.


     Peel your zucchini, and then chop them up into bite-size pieces. Grate the cheese or cheeses of you choosing. This is where you can really customize this dish. It can be totally kid friendly or parent-pleasing. Either way, you will receive rounds of applause for this little jewel!

   
     When the rice is done after about 20 minutes, remove it from heat and quickly add all of the ingredients. All that remains is to stir it up until all of the cheese is melted.

     The heat from the rice actually cooks the zucchini just enough so that it's not raw but still crunchy! This is also an excellent way to sneak some vegetables into your diet without being overwhelmed by all that green. Don't judge me!


     Ok, well - I hope you like Cheesy Zucchini Rice as much as my people and I do. I've had to make it twice this week.

Love,

Liz

Tuesday, May 6, 2014

Candied Pecan Chocolate Chip Cookies, Y'all!


I missed my stepfather's birthday this year. Yeah, I know - I'm the worst. But trust me, I have an excellent excuse. I had his birthday saved in my old phone on the calendar, but it got lost when my stepfather gave me a new phone for Christmas. So, if you think about it . . . it's really all his fault. To make up for it, I decided to make him a treat because he's almost sixty and can pretty much buy anything he actually wants.


You will need:
Cookie Dough:
  • 2 1/4 cup flour
  • 1 TSP baking soda
  • 1 TSP salt
  • 2 sticks of soft butter
  • 1 1/4 cup brown sugar
  • 1/4 cup white sugar
  • 1 TSP vanilla extract
  • 2 large eggs
  • 2 cups semi-sweet chocolate chips
 Candied Pecans:
  • 1 cup pecans, whole or chopped
  • 2 TBSP brown sugar
  • 2 TBSP butter
Preheat your oven to 375.

Get a large bowl and mix up the white sugar, brown sugar, butter, and vanilla extract until it's creamy. Add the eggs in one at a time and make sure you mix them in all the way. Otherwise, you could get scrumptious chunks of cooked egg in your cookies.

In a small bowl, combine salt, flour, and baking soda. Spill some of the flour mixture into the sugar mixture and mix it real well. Continue adding the flour mixture a little bit at a time making sure it's incorporated completely it has become some tasty-delicious cookie dough.


Next add the chocolate chips and we can move on to the star of this cookie show!


THE CANDIED PECANS.

This is so serious y'all. Pecans are a big deal in the South, but they're just as tasty up here in the slowly-thawing North.


Get a small frying pan, preferably, set it on medium and start melting that butter. Drop in one pecan at a time until the butter starts sizzling, then dump in the rest of the nuts and brown sugar. Use a spatula to mix it all around in the pan and really get those pecans coated in the butter and sugar.


Let them simmer for 5-8 minutes on medium and then remove it from heat completely. I left mine on the stove and the sugar caramelized onto the bottom of the pan, womp, womp.

Stir the candied pecans into the cookie dough. Roll the cookie dough into about the size of a golf ball and set up nine on a cookie sheet. Make sure they're spread evenly apart, unless you like twin cookies. Bake them for 9-12 minutes. I made three pans worth of cookies, nine each which makes twenty-seven cookies all together.


I don't know if my stepfather likes them. I haven't heard from him since I gave him the cookies so I assume his mouth is too jammed full to speak.

Monday, June 24, 2013

Spoiled Dog Omelette Treats

This is Shadow!
Like most people my age, I've hit hard times in this economic quagmire we live in. In other words, the Super Chef is SUPER BROKE! Now that I live with my mother again, only organic produce and products enter this domicile. Since my mother graciously lets us (my cats and dog) stay with her, I can't help but think, "Why shouldn't my dog be eating organic, too?"

Then I really started looking at what was is in these dog treats. You see, nothing is "too good" for my "spoily" boy! He's my dog, I raised him - ya know? So I want to give him something that isn't killing him. A lot of these treats contained meat and bone meal, which is pulverized animal bones and meat scraps that aren't fit for human consumption let alone a beloved best friend. There were also many ingredients with names far too long to remember or pronounce paired with a string of numbers to classify the chemical compound. WHOA. This is too many ingredients for a dog biscuit.

See the wonky one?
After the last batch of cheap dog treats, as I mentioned before I am lacking in funds, in which I found a jagged shard of bone, I realized it was time to take matters into my own hands. Also, I concluded that baking my own dog treats was the most viable, and fun, option!

I  scoured the internet looking for suitable recipes, tweaked one to suit my doggie's appetite, and came up with this! Since I used a hard boiled egg and cheese, and my boy is so spoiled, I decided to call them Spoiled Dog Omelette Treat!

You will need:
  • 2 1/2 cups flour (wheat flour or oatmeal can be substituted for flour)
  • 1 egg
  • 1 tsp salt
  • 1 tsp beef or chicken stock (bouillon granules or broth can be substituted for stock)
  • 1/2 cup hot water
  • 1 hard boiled egg (chopped)
  • 1/2 cup shredded cheese
Preheat the oven to 350.

Take a small pot of water and heat it on low-medium heat and add the beef or chicken stock. Stir it every so often until it breaks up in the water.

Mix the flour, raw egg, diluted beef or chicken stock, 1/4 cup shredded cheese, and chopped hard boiled egg in a large mixing bowl with a big wooden spoon. Once it starts getting difficult to stir, dig in! Knead the dough for about 3 minutes. If the dough is too dry add a little bit of water, but not too much or the dough will turn to paste.

Form the dough into a ball and place it on a piece of parchment paper. Sprinkle some flour onto the parchment paper and rub some onto your rolling pin. This will keep the dough from sticking when you're trying to roll it out. Roll out the dough until it's about 1/2 inch thick.

COOKIE CUTTER TIME! This is the fun part, getting creative with the cookie cutters! Dog's don't care what shape their food is, but it's fun for us. I choose a tiny star cookie cutter my mother had. There are lots of different kind of cutters to choose from though, including bone shapes! So cute!

Lightly grease a cookie sheet with olive oil and place the biscuit pieces on the sheet. Top each biscuit with a little bit of the remaining cheese. Throw it in the oven for 30 minutes. Before you think you're done, check the biscuits through with a toothpick.

Of course, you don't want to burn your hungry, hairy friend so wait about 5-10 minutes for these cheesy, eggy wonders to cool. Make sure they've completely cooled down before putting them away. Store them in an air-tight container when your pup isn't chowing down on some Spoiled Dog Omelette Treats!

BEWARE: Not all dogs can digest eggs as well as my boy. Try giving your dog a small piece first and wait a day if your not sure how he'll respond.

Love,

Liz

Wednesday, February 29, 2012

Easy No-Bake Chicken Parmesan, LEAP DAY!

Happy Leap Day, everyone! To celebrate this rare occasion I present to you a quick and simple no-bake Chicken Parmesan dish.

You will need:
  • 3-4 thin chicken cutlets
  • 2 cups flour
  • 2 TBSP lemon pepper
  • 2 cups shredded Mozzarella cheese
  • 1 TSP salt
  • 1 cup vegetable oil
  • 1 16 oz. box of Ziti pasta
  • tomato sauce
  • grated Parmesan cheese to garnish
Be it store bought or homemade, you'll need some sort of tomato sauce to smother your cheesy, chicken concoction.

Rinse off the chicken cutlets and place them on a paper towel to dry. Season the cutlets with salt. Combine the flour, lemon pepper, and salt in a large Ziplock or plastic grocery bag.


Heat the vegetable oil in a medium sized skillet on medium-high heat. Wait until the oil has a chance to get hot. When that chicken hits the oil, you want it to sizzle!

Take a chicken cutlet and drop it in the flour mixture and shake it up. You're going to want to keep a firm grasp on that bag so you don't get flour all over your kitchen. Make sure the cutlet is totally covered in flour. Place it in the hot oil. Repeat with each cutlet. Let them cook for about 4 minutes on each side. Remove them from the oil and let them dry on a bed of fresh paper towels. These will soak up the extra oil.

While the cutlets are still hot, sprinkle on the Mozzarella cheese and smother them with tomato sauce. Serve with a side of pasta. Don't forget, it wouldn't be Chicken Parmesan without some Parmesan cheese on top!


YUM! Enjoy-a this-s simple-a recipe-a, from-a me to-a you! That's my Italian accent. ENOY!

Love,

Liz


Wednesday, November 2, 2011

Ritz Cracker Crusted Chicken


I crave comfort food as the weather gets colder. The cold wind and gray skies that chill you to the bone and make you hunger for something warm in your belly. And although I'm nowhere near the crispy foliage and gloomy ambiance of Fall in New England, I require sustenance appropriate to the season. I mean, nothing says "Autumn" quite like the palm trees and blue skies of Savannah, GA.

No matter how I've tried it, dipped in egg, slathered in butter, and coated in bread crumbs, I just could get my chicken crispy. My Nanna always made the best everything, as I'm sure you know if you've taken a gander at most of my recipes. She uses Depression-era common sense with modern cooking conveniences that give her recipes the homey, old world quality that fills up any tummy with scrumptiousness.

Here's what you need to make extra crispy chicken skin with a delicious sweet and salty cracker crust:

  • 1 sleeve of Ritz Crackers
  • 6-8 chicken legs, with or without skin
  • 1/2 cup mayonaise
  • salt
  • pepper
Preheat your oven to 325-350.

In a sandwich bag, break up all the crackers into tiny crumbs. Season with salt and pepper.

Wash off the chicken legs and dry them on a couple of paper towels. Season them lightly with salt. Use a spatula or spoon to coat each chicken leg with mayonnaise.

There's two ways you can Ritz up the chicken legs. You can either shake them up in a Ziplock bag or grocery bag. Sometimes this gets all the other crumbs moist, though, and I don't like that.

The other option is to spread out your crumbs on a small plate with a rim to prevent spillage. Dump more bread crumbs over the legs. Keep rolling the chicken leg around over the crumbs until its fully coated. Press the crumbs in to make sure they stick.

Rip off a sheet of parchment paper to line a small baking pan. Place chicken legs evenly on the baking pan. Sprinkle with salt and pepper. Bake for 30-40 minutes.

Serve with mashed potatoes and stuffing on the side. Well, I like mashed potatoes and stuffing on the side of everything, really.


Love,

Liz


Saturday, September 24, 2011

My Nanna's Homemade Beef Stew

Me and My Nanna. If you know me, you know ONE thing for sure; I love my Nanna.

Honest to God, I spent every Friday night of my life at my Nanna's house until I left for college. You know that Shepherd's Pie recipe I have of hers? She would make that for me every almost Friday night. After dinner, I'd have it as a snack while I watched Sabrina the Teenage Witch. If there was any left over, I'd have it for breakfast.

My Nanna is the best cook in the world. Everything she makes reminds me of those Friday nights I spent at her house eating and drawing and painting and eating. Not eating paint, though. But, yeah, my Nanna is awesome. And I miss her A LOT.

So my favorite way of NOT missing her is to cook! And since Autumn is on it's way, I've been craving some comfort food, New England Style. PLUS, my Nanna makes the BEST Beef Stew so I called her up and made my demands clear. From the intel I gathered, your orders are as follow:

You will need:
  • 2 lbs. stew beef (cut into bite-sized chunks)
  • 3-4 carrots (sliced)
  • 4 beef bouillon cubes OR 4 cups beef broth
  • 3-4 yellow potatoes (bite-size)
  • 2 yellow onions (diced)
  • 1 14.5 oz. can cut green beans OR peas (I used green beans)
  • 2 TBSP cornstarch
  • 2 TBSP Worcestershire sauce
  • salt
  • pepper
  • parsley flakes
Get a  big old stew pot and slap it on the stove. Dump in the stew beef and Worcestershire sauce. While the beef is browning, use this time to dice up the onions. After the beef has browned a bit, add the onions then continue simmer on low.

If you have beef broth, skip this step. Dissolve each beef bouillon cube in it's own separate cup of hot water. That's 1 cup for every 1 cube. Once the beef has fully browned, add the beef broth or beef stock you created.

The carrots go in next because they need to cook a little longer than the potatoes. You can take this time to add some salt, pepper, and parsley flakes to your liking. Now add the potatoes, and green beans. Simmer until both carrots and potatoes are fork tender.

Mix the cornstarch with 1/3 cup of cold water until it's completely dissolved. Gradually stir it into the stew. This will thicken up the base and make it more gravy-like.

You're ready to reduce the heat and serve! I like mine with a bit of bread and butta'.

Love,

Liz

Wednesday, July 27, 2011

Thai Red Curry Deviled Eggs TRADER JOE'S STYLE!


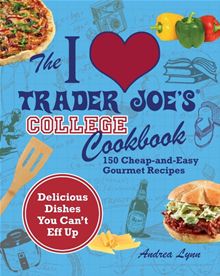
This is the first ever guest recipe. This recipe is by Andrea Lynn and can be found in her new publication, The Trader Joe's College Cookbook.


Most of these recipes require signature Trader Joe's items, many of which I couldn't find a replacement for. So I went for a classic that I've never even tried before! Thai Red Curry Deviled Eggs, mmm.


 You will need:
  • 1 (9.3-ounce) package Trader Joe's Cage Free Fresh Hard-Cooked Peeled Eggs (6 eggs)
  • 2 TBSP mayonnaise
  • 2 TBSP Trader Joe's Thai Red Curry Sauce
  • 1 TSP lime juice
  • 1 scallion (chopped) plus extra for garnish
  • 1 TSP kosher salt
Unfortunately, the closest Trader Joe's near me is as far away as Athens, GA and my muffler can't handle that right now. So, I substituted the Trader Joe's Cage Free Fresh Hard-Cooked Peeled Eggs for 6 large eggs that I hard-boiled myself and instead of Trader Joe's Thai Red Curry Sauce I used 1 TSP regular Thai red curry paste.

The first thing you need to do is boil the eggs. The I Love Trader Joe's College Cookbook has a convenient Tips& Techniques section at the back of the book.

But for y'all who don't have a copy yet; put your eggs in a pot with water, enough to cover the eggs. Bring the water to a boil then cover the pot with a lid and remove it from heat. Let the eggs sit in the pot for 12 minutes. Carefully drain the eggs and refill the pot with cool water. Now you can peel the eggs without cooking your hands.

Cut each unpeeled egg in half lengthwise. Daintily scoop out the yolk and place it in a small mixing bowl. Place all egg halves hallow side up. Once you've got all the yolks, add the mayonnaise, scallions, lime juice, salt, and red curry paste or Trader Joe's Thai Red Curry Sauce.

Spoon the yolk mixture into the hallows of the egg halves. Garnish with the extra chopped scallions.


These were yummier than I thought they'd be! The only problem is saving them for when my boyfriend gets here . . . this isn't going to work.

Well, this is MY entry for the I Love Trader Joe's College Cookbook READER GIVE-AWAY!

Wish me luck.


Love,

Liz

Monday, July 18, 2011

A Few Quick Tips For Extra Yumminess

Just sitting around, thought I'd share a couple of hard earned cooking secrets.

NUMBAH ONE!

Next time you're making cupcakes from a box, try adding chocolate syrup! Give each cupcake one good squirt on top of the batter before you pop them in the oven. The chocolate syrup makes them ridiculously moist and super chocolately! It works great with Devil's Food as per my recent experience tonight.

For any cake flavor, substituting sour cream in place of milk or water will give your desserts a moist, fluffy texture. I hear tell you could even use fruit yogurt!


NUMBAH TWO!

Shallots! Shallots are a scrumptious alternative to regular onions. Trust me, after you try a shallot you will never buy a red onion again. I use them in pretty much everything to anything. They're terrific in a salad, sandwich, a light tomato sauce, with beef, topped on a steak, with chicken, in pasta salad, potato salad, whatever you want. They're a lot more crisp and lighter than a red onion, but on the other hand a bit stronger. If you don't like onions, I don't know what to say, you're hopeless so I don't expect you to appreciate anything like this.

I actually like them in my salad sandwiches. Say what? Salad sandwich. I get a whole wheat pita half, romaine lettuce hearts, tomato, shallots, red wine vinegar, olive oil, and a dash of salt. So tasty.

NUMBAH THREE!

When boiling up some pasta, add a drop of olive oil and a sprinkle of salt. The salt flavors the pasta, and the olive oil prevents it from sticking to the sides and bottoms of the pot.


NUMBAH FOUR!

Who spilled my cocaine!?
Which brings me to my next point. The previous tip usually gets me into the pickle of having wet salt. Wet salt sucks. It clumps up your shaker and ruins the rest of your salt. Easy way to prevent this, rice. Put a few grains of rice into your salt shaker. The rice will absorb any extra moister within the shaker saving your previous little time and temper.


That's all my tips for now. I'll call my Nanny and see if I can't squeeze out some of her Great Depression tips or my sister for some busy-mother-of-two tips.

Keep a look out for news on the up-coming READER GIVE -AWAY of Andrea Lynn's The I Love Trader Joe's College Cookbook and the book tour under the same name! Check out the link above to visit Andrea Lynn's website and peruse her fabulous recipes and articles.

Love,

Liz

Thursday, June 16, 2011

Dr. Pepper Pulled Pork

Put on your britches and get out your slow cooker, bitches. It's time for some BBQ. Dr. Pepper stizzyle.

Ridiculous. Anyways, Dr. Pepper More than Mesquite Marinade is a wonderful, highly recommended, but not necessary ingredient. I happen to find it at a local gift shop that happen to have a HUGE variety of BBQ and hot sauces. Very handy for Father's Day. However, it might not be as easy for someone in say . . . Botswana to find any Dr. Pepper Marinade in just any old store. I found a few online stores that carry it including right here at saucenspice.com.

Moving on, the slow cooker is a very important tool for any amateur chef. It's great for those days when you got a lot of errands to do and need a lot of food later on. It's great for roasts, chicken, rice, potatoes, soups, stews, chili, really anything. You can throw all your ingredients into it and let it cook for at least 3 hours, longer if you want it more delicious. Personally, I like to start a dish at about 4 AM (bed time) so it can simmer at least 12 hours. Plus, they're cheap. So there's really no reason for you not to have one.


For this recipe, you will need:
  • 3-5 lb. pork butt roast, size really depends on the size of your crock pot or slow cooker and amount of people you're serving
  • 14 oz. bottle Dr. Pepper More than Mesquite Marinade
  • 24 oz. bottle of your favorite BBQ sauce
  • 1/2 cup spicy mustard
  • 1/2 cup brown sugar
  • 1 green bell pepper, sliced
  • 1 large white onion, sliced
  • 2 limes
  • 1 clove garlic, diced
  • salt
  • pepper
Wash off the pork roast and place it on a plate with a paper towel underneath to absorb the extra run off. Season the roast with salt and pepper. Transfer the roast into the slow cooker. Cover it with half the bottle of Dr. Pepper More than Mesquite Marinade, half the bottle of BBQ sauce, the green peppers and onions.


Pop the top on the slow cooker, crank it to Low Heat and leave it alone for hours upon hours. Like I said, I'll leave that sucker in there half a day, I don't even care. But if you're in a hurry, wait about 4 hours until checking how tender the roast is. It's incredibly important to leave the top on at all times and not to fuss with the temperature or anything else until the pivotal moment. Once the urge is upon you to definitively surmise that the roast is tender enough, the sauce should be gently bubbling and the vegetables should appear wilted and soggy.

Now, transfer the roast onto a pan or clean plate. At this point I usually throw away the juices and vegetables in the pot. I find that the onions and peppers completely absorb the taste of the sauces and offers no yum factor. But if you think you'd like them, be my guest.

Return the pork roast to the slow cooker. Grab 2 forks and sort of use them to rip apart the roast like a hermit crab digging into the sand. Strange analogy, I know, but it's the only thing I could think of that came close enough. If it doesn't start to rip up so easily, don't worry.

Dump the rest of the Dr. Pepper, BBQ sauce, spicy mustard, brown sugar, and diced garlic. Take the limes and roll them with the palms of your hands on your counter or any flat surface. This loosens up the juices in the limes. Cut them in half and squeeze upside down onto the roast, assuming that you've kept up with washing your hands during this episode.

Keep the slow cooker on low, let it simmer for a few more hours. After about 3 hours, start ripping it up again. Continue to rip apart the pork and let it cook for about an hour. You'll know when it's ready because you'll have eaten most of it just through "tastes", but as a general guide: the more you pull apart the pork, the more the sauces can seep into the meat and penetrate the porky flavors.


Serve it on a nice toasted bun with a slice of Colby Jack cheese and some pasta salad (my new favorite side!).

Next week, shallots and why you'll never bother with red onions again. Ever.

Love,

Liz


Thursday, March 3, 2011

Bo-Nanny Banana Bread

 It's pretty hard to keep banana bread around in my house. Either my friends visit and eat it, someone finds outs I made it and asks me to bring them some, or hell, I've eaten a whole loaf in less than 24 hours.

This is my Mamma's recipe which is my Nanny's recipe, but this time its all me. My Nanny likes hers plain, my Mamma likes chocolate chips in her banana bread, but I love walnuts . . . in everything. And lately, since my affair with Fried Bananagins, brown sugar is a new favorite ingredient. I hope you enjoy this recipe as much as I do. And I THOROUGHLY do.

You will need:
  • 1 3/4 cups sifted flour
  • 2 tsps baking powder
  • 1/4 tsps baking soda
  • 1 1/2 tsps salt
  • 1/3 cup butter (room temperature)
  • 2/3 cup sugar
  • 2 eggs
  • 1 cup mashed ripe bananas (2-3 bananas)
  • 1 cup chopped walnuts (plus a handful for the finish!)
  • 1 1/2 tbsp brown sugar
Preheat oven to 350.

In a small bowl, combine sifted flour, baking soda, baking powder, and salt. Mix together butter and sugar until soft and fluffy in a medium sized bowl. Next add eggs, mix well. Alternately add flour mixture then bananas then walnuts to the butter and sugar. Mix thoroughly after each addition.
Sprinkle the top of the banana bread with walnuts and brown sugar.

Pour into a well- greased loaf pan. Bake for 1 hour and 10 minutes. Before the last 10 minutes, I like to pull the pan out of the oven and put a little extra brown sugar on top.

Please, for your own sake, wait like 15 minutes before you cut into this piece of fantastic. Then, slather on a pad of butter and wait for the addiction to settle in.
Love,
Liz

Monday, February 21, 2011

Bacon Stuffed Pork Chops!!


I must be channeling Paula Deen to be putting so much pork in one place, but I can't help myself! This is so good. And I promise you, it's much healthier than anything Paula Deen the Ham Queen ever made. Ham butter? Ew.

So, I basically took my Nanny's stuffed pork chops recipe and added a few things.

You will need:
  • 2 thick cut pork chops
  • 2 celery stalks
  • 1 onion
  • 1 TBSP butter
  • garlic powder
  • salt
  • pepper
  • lemon (optional)
  • 1 box herb stuffing
  • 2 strips thick cut bacon
Preheat the oven to 425.
First, fry up them bacons. If you don't know how to prepare bacon at your age, that's a shame and I pity you. Heat up the pan, fry on med-high heat for about 5-7 minutes on each side. ANYWAY, while that's going on, take this time to cut your celery stalks into long quarters and dice them. Then, dice up that onion, too.
Heat up a small skillet and put the butter in there. Now sautee your vegetable at a medium heat until tender. Season with salt, pepper, and garlic powder then remove from heat. Once the bacon is cooked evenly, remove from the pan and place on a paper towel to degrease them. make sure to blot both sides thoroughly. Let the bacon cool and then rip it into little bits with your fingers.

Follow the directions on the stuffing box then add vegetables and bacon chunks, mix it up, pop the cover on and remove from heat.

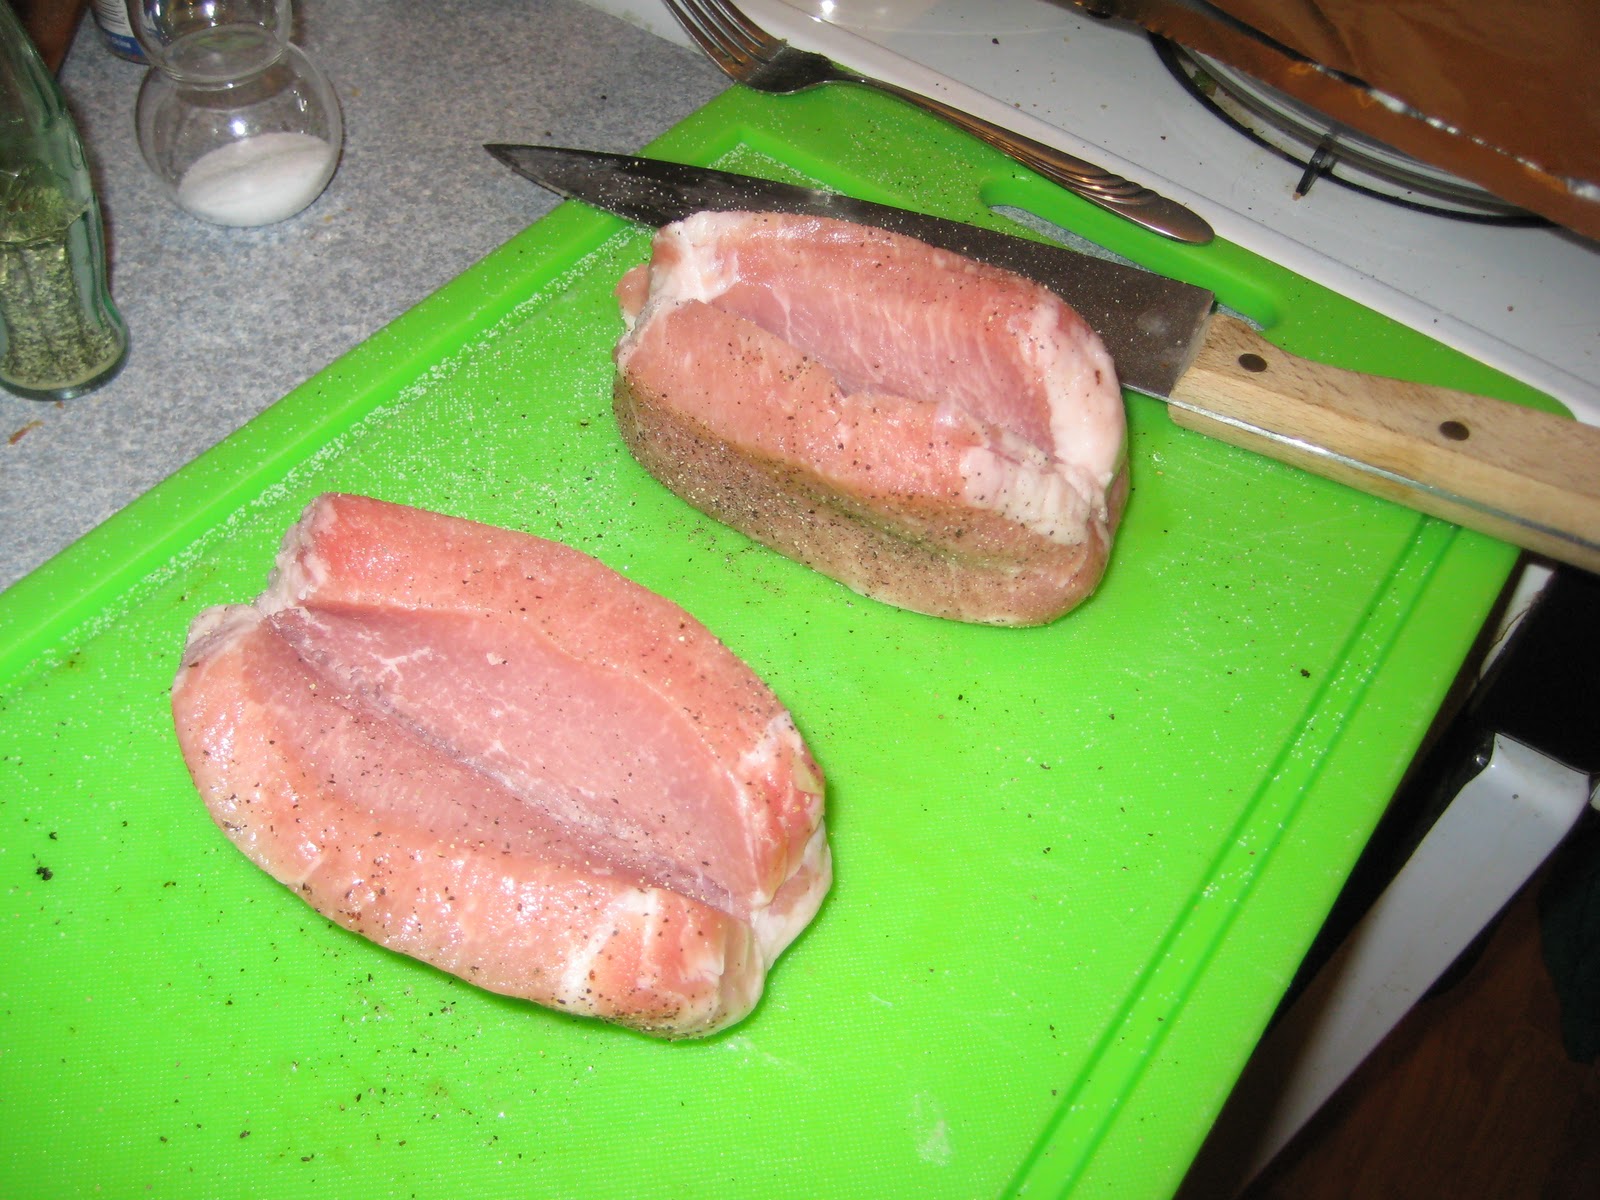
While the stuffing is sitting, season the pork chops on each side with salt and pepper. Get a big, sharp knife and make an incision in the middle on the long side where there's no fat (it's easier). Make it sort of a curved cut so that the stuffing has a pocket to rest in. And yes this looks hilarious, but please, soldier on.
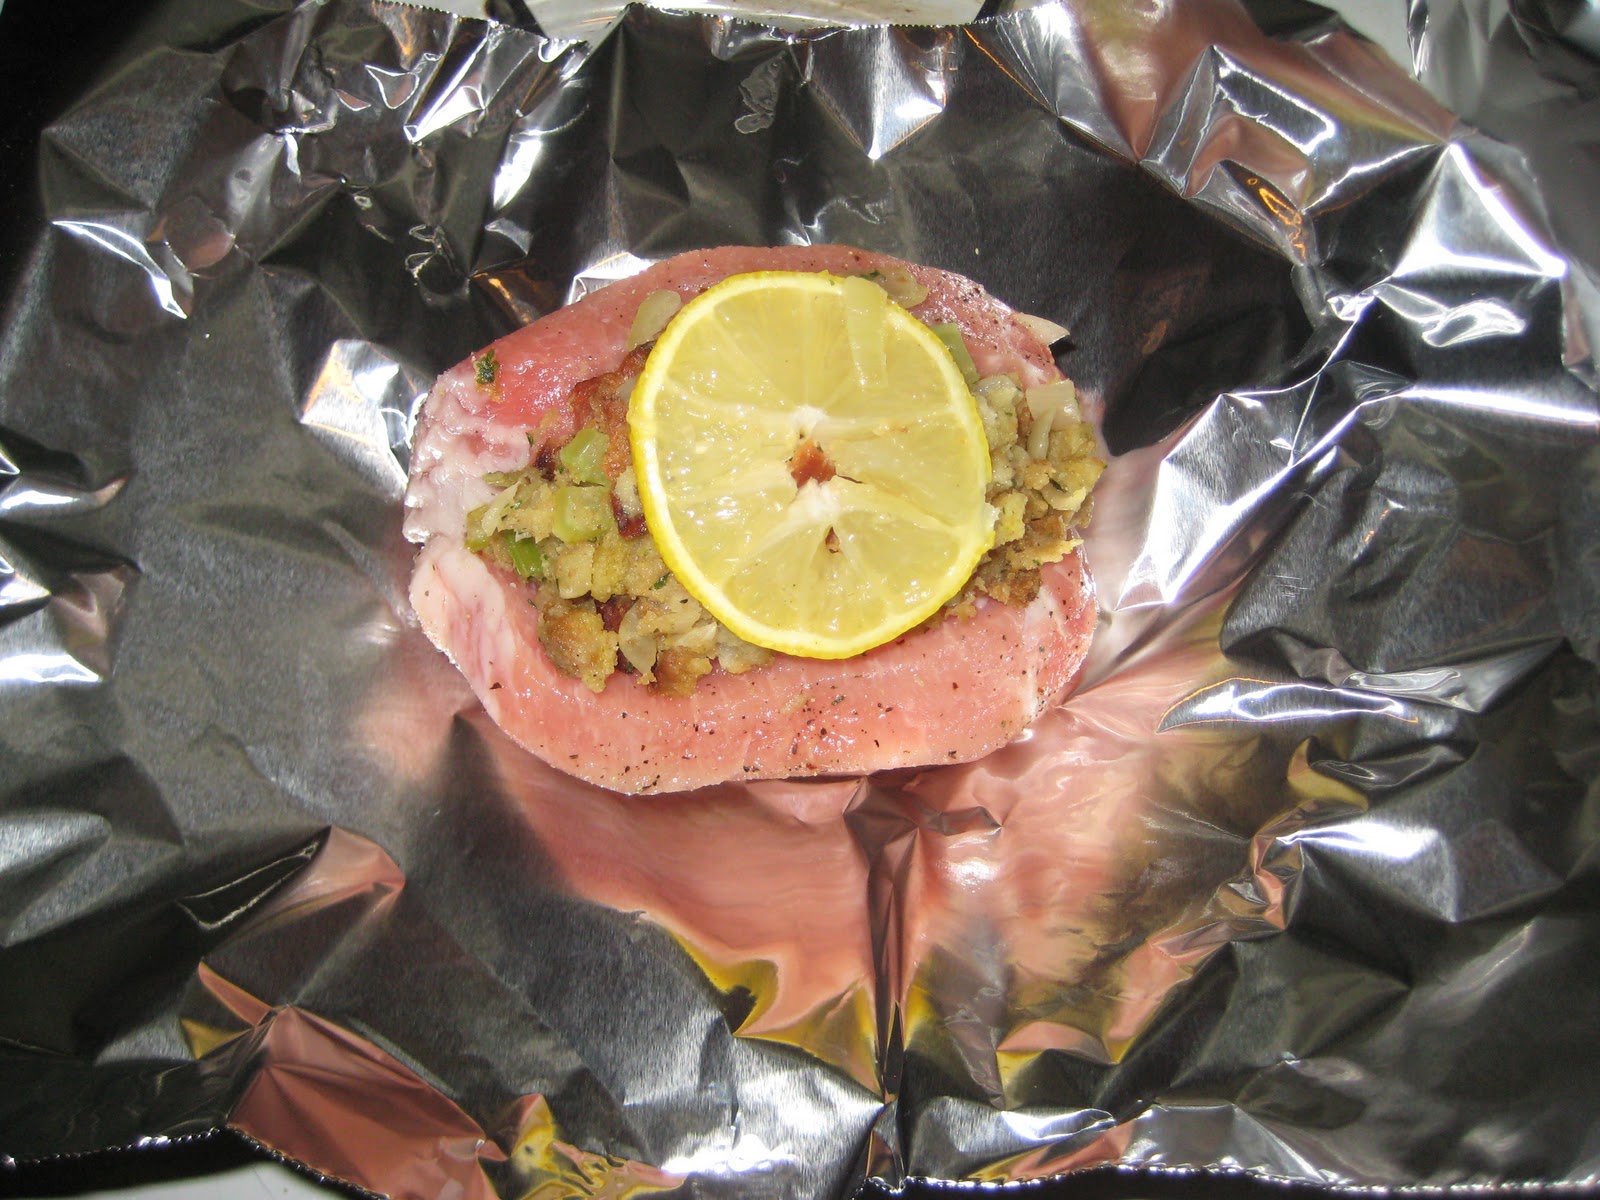
Set aside about 2 cups of stuffing so that you're not re-dipping with a spoon covered in raw pork. Spoon in the stuffing and really pack it in there. Now get two lemon slices and place them on top on the stuffing. You don't have to, but it's pretty and adds a nice light flavor.
Wrap the pork chops in separate aluminum foil sheets so that they close at the top. Place them in a baking dish and bake for 40 minutes. Then, open foil and bake for another 5-8 minutes to give the stuffing a crispy shell.
Oh, my God. This stuffing is so good. Mmmmmm, pig meat.

Love,

Liz

P.S. Always make sure to cook all pork products thoroughly otherwise, YOU WILL DIE.